
Unity 3d Tutorial: What is the Particle System?
In this Unity 3d tutorial we will look at Unity’s “Particle System”.
What is the Particle System?
Let’s see it as a particle generator included in the Unity engine, basically it is a gameObject that emits particles that have graphical effects. The particle system is also called an Emitter because of its characteristic of emitting particles.
The single particle is not to be considered a gameobject but a kind of simplified entity (a resource saver).
All emitted particles can be managed through its emitter and that is therefore their controller.
One can decide their movement, duration, speed and shape.
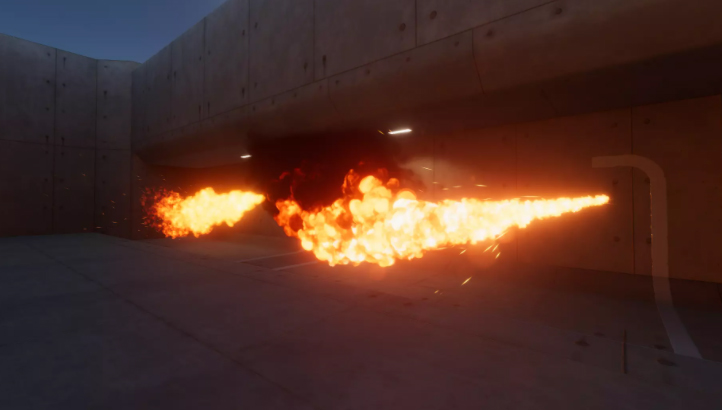
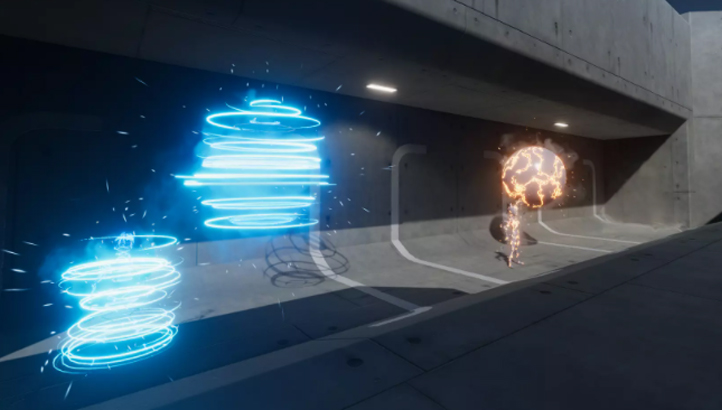
Thanks to this system we can create so many effects such as fire, water, explosions and much more.
If you want to look at some examples you can download them directly from Unity asset store by downloading the Particle System Pack.
Unity 3d Fireworks Tutorial: Let’s start creating them
The first thing to do is to insert the Particle System GameObject into our Unity project. Nothing could be simpler you can insert it like any other object by using the right button of our mouse and select “Effects/Particle System”.
Great, now we can see our particles.
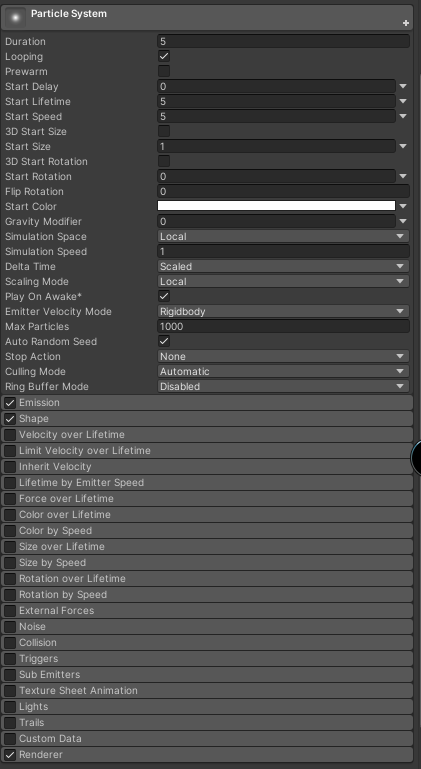
The next step will be to model the behavior of our particles to replicate a firework. Checking the inspector of our gameobject we will find the Particle System component with all the parameters needed to create our effect.
Let’s look at the main ones.
Duration: The Duration of the Particle System(PS) in seconds
Looping: Flag to indicate that it should execute the PS in Loop
Start Delay: Delayed Start in seconds
Start Lifetime: The duration in seconds of each particle
Start Speed: The initial speed of each individual particle
Gravity Modifier: The scale of gravity that the particle system will apply
Max Particles: The maximum number of particles we want to emit.
These are the ones I want to highlight, but as you see in the figure we have others.
If you want to go into the other parameters as well, you can take a look at the official Unity documentation on the subject.
We also have some optional features of our PS. As you can see in the picture, they are all on or off depending on the kind of effect you want to achieve. Let’s take a quick look at the ones we will definitely be using shortly:.
Emission: Everything related to how the particles are emitted
Shape: The shape we want from our emission
Color Over Lifetime: The change in color of the individual particle over its lifecycle
Sub Emitter: Properties for hooking new DPs as underlayers to the main one
Trails: Management of the trail of individual particles
Renderer: Here we can choose what kind of sprite, material will compose the individual particles
Unity 3d Fireworks Tutorial: Let’s create our own rocket
Remembering village festivals where pyrotechnics went crazy, we know exactly that we will need a rocket that will go up into the sky and then explode in bright colors.
So we need to make our own rocket.
Here is what we set:
Emission: Set the Rate Over Time to 1
Start Speed: We set a speed suitable for a 40 rocket :
Start Lifetime: We don’t need it to live long, we can make it die after 0.7 seconds
Shape: We change the angle of the output cone to 12 so that the rockets are in veritical.
Gravity Modifier: The last parameter to touch for now is gravity at 6. Everything that goes up sooner or later comes down….say the proverb lovers.
The rocket is almost done….but every self-respecting firework must have a wake…..but not a trivial wake we want a really nice, luminescent wake.
Unity 3d Tutorial sui fuochi d’artificio: é il momento della scia luminosa
We talked earlier about the trail property that emits a trail of the particles, but for what is my taste it is not enough for a fireworks display. I want the trail of our rockets to emit little stars that will enrich the stage effect.
So we will need the sprite of a starlet, you can use any drawing program to make it. The important thing, however, is that the end result is a PNG file with a transparent background. I drew myself this one, I’ll show you exactly what I mean.

My star with black background
Just to show you what I mean and how good I am at drawing

My star with transparent background
How it looks to you in the drawing program

Download it
if you don’t have software to make it, click on the image, right click and go ahead and use my
You may be wondering what a trail star can be used for and more importantly how do we make it beautiful and most importantly useful.
The Starlet will serve us to make a Material customized to our taste.
Not sure how to create a Material for Particle System? Let’s see how to do it!
The idea is to emit our starlet as if it were a particle and to do this we need to create a dedicated Material, once we create our PNG file it is quite simple although there are a few steps to complete.
Step1: Import our image to Unity as a Sprite
Remember to always keep your projects in order so let’s create a “Sprite” folder in our project asset.

Place the arrow on Asset of the “Project” window and select Create/Folder.

After creating the folder you can simply drag from the explorer the image into the created folder
Last step is to change in the inspector the texture type of our image to “Sprite (2D andUI)
Step2: We create a material and give it the shape of our starlet
Well, it’s time to create our material with our little stars in it.

First thing to do is to create our Material, of course we are neat and put in a dedicated folder

The next step is to change the properties of the material to make it suitable for the particle system. The property to choose is of the material’s shader as “Particles/Standard Surface” and the rendering mode “Additive“
And finally we just need to assign to the albedo of our material the sprite we prepared.
Step3: Let’s make sense of these stars.
With all the preparations done, it is time to actively work on our wake. But first let’s talk about a basic concept for this project.
In order to make a spectacular enough wake other particles must be emitted from the wake. To look at it in a simplified way we will tell each rocket particle we emit to emit star-shaped particles in turn.
We are talking about a sub-emission of particles, that is, a particle system emitting particles in turn. In order to do such an encapsulation we will use the SubEmitter property to hook up another particle emitter that will act as a wake.
So let’s start preparing a new particle system and create it as we did before and we will call it “StarSwipe.”
Let’s drag our material into the Material property of the Renderer control, now my new particles are all well-drawn stars.

Let’s take a look at how to create StarSkipping.

and we assign our new material
However, I am still not satisfied with them I think it is the case to rotate them, randomly, and I also think it is important to change in the shape of emission from conical to spherical.
For rotation I will use the “rotation over lifetime” which rotates the particles over their lifetime

We complete the light trail
Now that the stars are ready let’s leave them aside, we will pick them up later.
Let’s start preparing and actually implementing the light trail in the particle system of the Rocket made at the beginning.
The first thing we will do is enable the trail in the property of our main particle system (the one with the rocket to be clear).
As you can see the default trail is objectively ugly: it’s purple, wide and…in short it sucks.
First in the renderer property, now that we have enabled the trail, the option to enter the material for the trail has appeared. So let’s assign a white material.
Having done that the second parameter to touch is in the trail tab and it’s called With over trail. This parameter represents width over trail along its entire length.
Choose the value you like best, I chose 0.2 which seemed to fit. We are almost there, the trail looks better but it still lacks one small detail. I would like a wake that tapers at the bottom, like real ones. To do this we have to assign the curves property always to the with over trail parameter by clicking in the mini arrow to its right.
All we have to do is to choose from the “Particle System Curves” window the shape we like best from those already made. Remember that if you want you can modify the curve to your liking.

You might want to work on the colors before continuing
I admit that all this white doesn’t give me a festive air, so let’s start handling these colors.
Let’s start with the rocket and color it as real as possible, poking around the internet we find that yellow is a warmer temperature than red. As you can see at this address so I would say that our rocket should start yellow and end red.
To do this I will modify the “Color over Lifetime” property by selecting a gradient and consistently assigning yellow is red.

And here’s how to change the color of the rocket
Similarly we are going to edit in the Trails the “Color over Trail“
We make our starlets that little something more than the wake
Now that our rocket is colored and has a hint of an interesting wake let’s make it a little more spectacular and for that we will have to enable the “Sub Emitter” of our rocket and assign it as an emission our stars.
Once we have balanced the sub emitter we will need to add an emission and drag our stars into it. Remember to choose Birth as the property of the emission, which indicates that the emission should start at the birth of the rocket particle.
Okay, I admit that right now our stars are anything but “cool” but we just need to make a few minor adjustments:
Start Lifetime=0.5
Start Speed=0.5
Start Size=0.3
Shape/Radius=0.0001
Emission=300
Now it is much more attractive
But there is still a little something missing to satisfy me. I want to add some color to my stars and so I’m going to work on the Color over lifetime property by choosing of my color gradient the ones I like best, I’m going to put some yellow and blue.
Last step of our unity 3d tutorial: the final explosion
The rocket with its wake is practically complete, but like any self-respecting firework it is missing the final show the explosion of the rocket.
As we can imagine the best way to get the explosion is to add another Sub Emitter to our rocket, but this time we do not set it as Birth but as Death i.e. running at the end of the rocket’s life.
For convenience I prepare the explosion in an external PS and as for stars we will add it successively to the rocket.
The main characteristic of an explosion is given by two parameters in particular Emission enabling Burst and its loop property which will have to be disabled.
Obviously also its emission lo shape which will have to be spherical.

As you can see from the steps I made here is our explosion, don’t forget to put a hint of gravity

Also on the explosion we work by fixing colors and putting a minimum of wake. The properties to be touched only those already touched for the flare.

So it is time to move our explosion as the Sub Emitter of the rocket is we should be there.
Unity 3d Tutorial: Conclusions
The tutorial is finished, a youtube version will also be posted for those who are more into multimedia.
Remember that we have only seen some of the possibilities of the particle system and with a little study you can do some interesting things but remember to always keep in mind that resources are not infinite in a system and optimizing is always good and right.
Feel free to write to us if you want to explore other topics or need help on some aspect.
You can also find the video version of this tutorial on our YouTube channel
